Schedules
What Are Schedules?
Schedules in Lighthouse Alerts allow you to control when monitoring alerts are sent. They help you avoid unnecessary notifications during specific times, such as maintenance windows or non-working hours.
By using schedules, you can ensure that alerts are only sent when they are relevant to you or your team. This is especially useful for businesses that operate during fixed hours or teams that need to reduce noise outside of critical periods.
How Do Schedules Work?
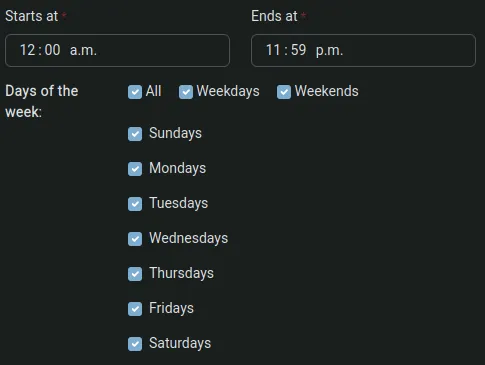
- You can create multiple schedules, each with a unique name, start and end times, and selected days of the week.
- Schedules can be attached to monitors and/or alert channels:
- If a schedule is attached to a monitor, then checking that monitor will not be done during the scheduled time.
- If a schedule is attached to a channel, then alerts will not be sent through that channel during the scheduled time.
How to Use Schedules
- Create a Schedule
- Go to the “Schedules” section in your Lighthouse Alerts dashboard.
- Press “New Schedule” and give it a descriptive name (e.g., “Business Hours”, “Weekend Maintenance”).
- Set the start and end times for the schedule.
- Select the days of the week when the schedule should be active.

- How to Attach a Schedule to a Monitor
- Navigate to the “Monitors” section in your account dashboard.
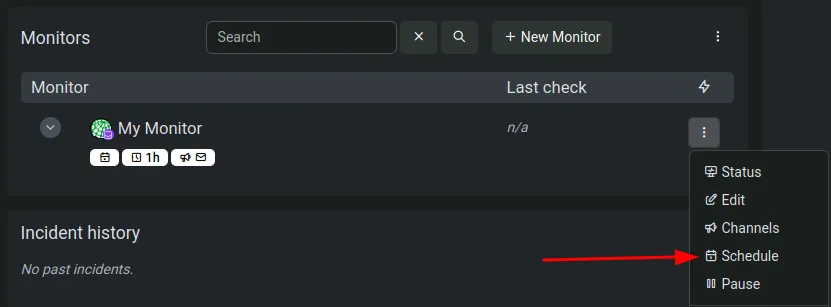
- Select the “Schedule” options in the monitor you want to apply the schedule to.
- Select the the schedule and press “Save”

- Attach a Schedule to an Alert Channel
- Go to “Channels” and find the channel you want to apply the schedule to.
- Tap the three-dot menu and select “Schedule”
- Select the the schedule and press “Save”

Copyright © 2025 Lighthouse Alerts